Linux Server Hardening Basics
On this page
Why new servers need hardening immediately
Any server with a public IP is scanned and brute-forced almost immediately. Hardening reduces what attackers can reach, and limits the damage when something does go wrong. Do it in order of impact.
1. SSH hardening: keys only, no root login
Check the effective configuration, not just the file:
sudo sshd -T | grep -E '^(permitrootlogin|passwordauthentication|pubkeyauthentication|kbdinteractiveauthentication) 'permitrootlogin prohibit-password
pubkeyauthentication yes
passwordauthentication no
kbdinteractiveauthentication noThe course VM already disables passwords. If yours doesn't, set in /etc/ssh/sshd_config.d/hardening.conf:
PermitRootLogin no
PasswordAuthentication no
KbdInteractiveAuthentication no
Then sudo sshd -t (syntax check) and reload. Keep your current session open and test a new login before closing it, or a mistake locks you out. Admins log in as themselves and use sudo (Day 5). For more, use a bastion host or a VPN (Day 23), or remove SSH from the internet entirely with a cloud session manager.
2. A default-deny firewall with ufw
With ufw on Ubuntu:
sudo ufw default deny incoming
sudo ufw default allow outgoing
sudo ufw limit OpenSSH          # allow SSH, with rate limiting
sudo ufw allow 80/tcp
sudo ufw allow 443/tcp
sudo ufw enable
A rule-order trap from testing: the course VM was first configured with ufw allow OpenSSH and then ufw limit 22/tcp:
To                         Action      From
22/tcp (OpenSSH)           ALLOW IN    Anywhere
80/tcp                     ALLOW IN    Anywhere
22/tcp                     LIMIT IN    Anywhere
Rules are checked top to bottom and the first match wins, so the plain ALLOW handles every SSH connection and the rate limit never applies. Use limit instead of allow for SSH. On cloud servers, security groups do the same job one layer out (see the AWS course); use both.
Check what's listening before and after (Day 22): ss -tlnH on the VM showed SSH and nginx on all interfaces, and the app and DNS stub only on localhost, which is what you want.
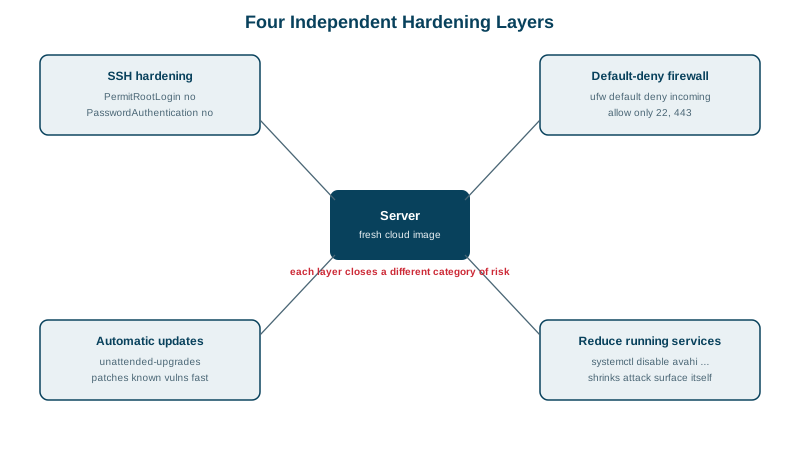
3. Automatic security updates
unattended-upgrades 2.12ubuntu9
APT::Periodic::Update-Package-Lists "1";
APT::Periodic::Unattended-Upgrade "1";
Installed and enabled by default on Ubuntu. Check /var/log/unattended-upgrades/ occasionally, and schedule reboots for kernel updates (or use livepatching).
4. Fewer accounts, fewer packages
Accounts that can log in on the VM:
awk -F: '$7 !~ /(nologin|false)$/ {print $1, $7}' /etc/passwdroot /bin/bash
sync /bin/sync
alice /bin/bash
priya /bin/bash(plus the VM's own provisioning user). Remove or lock accounts nobody uses (usermod -L, or delete them), give service users nologin shells (Day 5), and remove packages and services you don't need: each is attack surface and something to patch.
5. Least privilege for services
- Each service under its own unprivileged user.
- systemd sandboxing: the course's service went from exposure 8.3 to 1.7 with a hardening drop-in (Day 19).
- Narrow sudo rules, validated with
visudo(Day 5). - Secrets in files readable only by the service (mode 600 or 640), never world-readable.
6. Know what is happening: logs, alerts and audits
- Logs shipped off the server so an attacker can't erase them (Day 24).
- Alerts on failed logins, new sudo use and new listening ports.
fail2banorsshguardblock repeated failed logins (largely redundant with keys only, but they cut log noise).- Benchmarks and scanners: CIS Benchmarks,
lynis audit system, and your cloud provider's inspector.
Check yourself
If the new configuration is wrong, the open session still works and you can fix it; otherwise you may lock yourself out of the server. Run sshd -t and test a new connection before closing the old one.
ufw evaluates rules in order, and an earlier ALLOW rule for the same port matched first, so connections never reached the LIMIT rule. Delete the ALLOW rule or insert LIMIT above it.
Nobody can log in as them interactively, even if their credentials or keys are exposed. The service still runs normally because systemd starts it directly.
It watches logs for repeated failed logins and temporarily blocks the offending IP addresses in the firewall. It cuts down brute-force noise, though key-only SSH authentication is what actually stops password guessing.
Every installed service is potential attack surface and must be patched, monitored and configured. Fewer packages means fewer vulnerabilities to track and fewer ways in for an attacker.